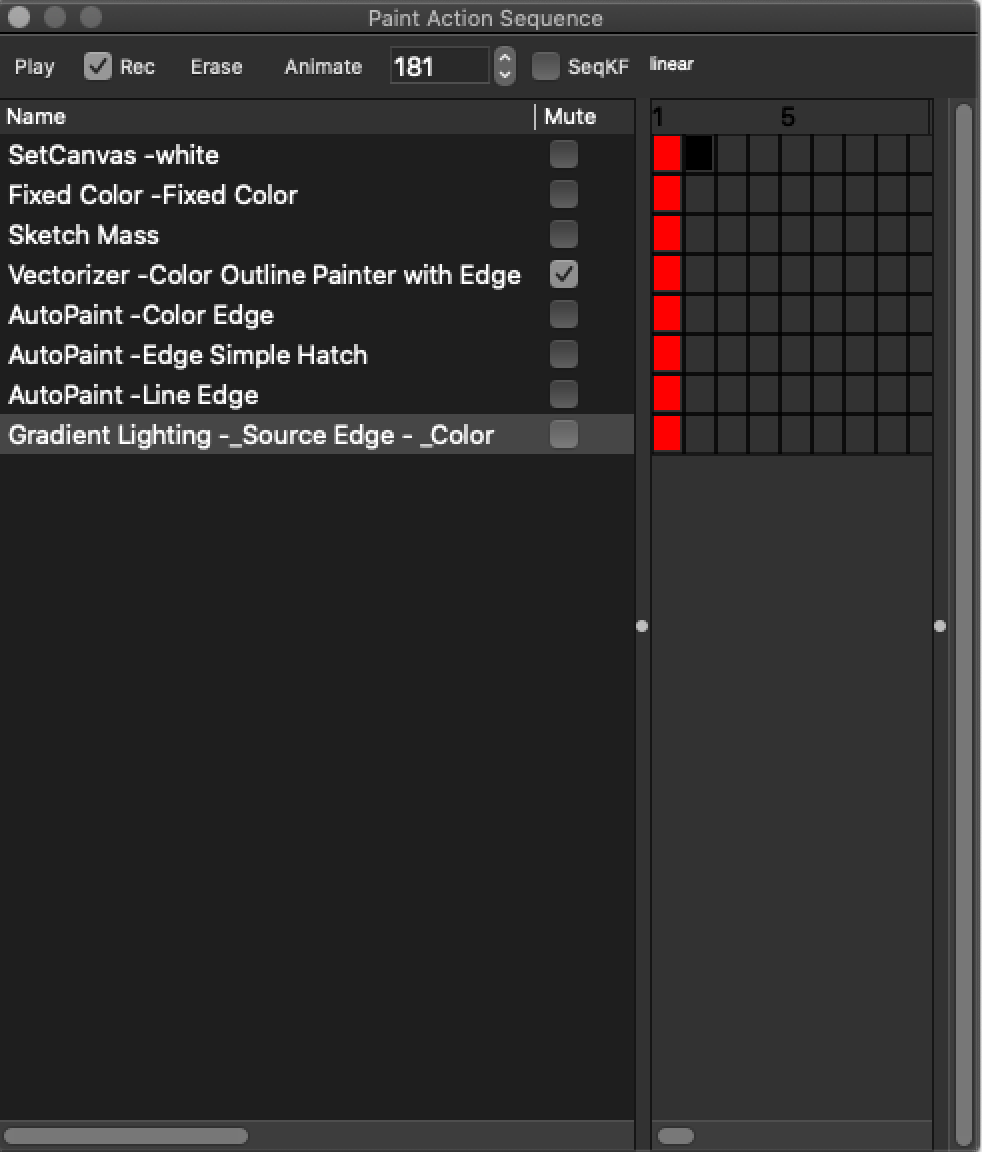
When you are designing in Studio Artist you need to create and record a Paint Action Sequence which is basically a script of everything that you do to design an image. Window > Paint Action Sequence.
How to use a lower resolution Canvas when designing and then Output at High Resolution
When you are designing you should keep your canvas around 2k. All the presets are designed for that size canvas so you can work quickly. The presets will not look right if you are trying to design with a hight resolution canvas. But no worries.
Studio Artist has the ability to rescale all the presets resolution independently for high resolution canvases (similar to vector but also for raster paints and effects). So there is no need to design at high resolution canvases. In fact, with Studio Artist is this will significant slow your process down and there is no need for that. You just need to make a PAseq (Paint Action Sequence) which is basically a script of all your design steps and then rescale it when you are ready to output to a high resolution canvas.
Here's how to do that.
Making and Editing the PASeq
Make sure the PASeq window is open. In your PASeq you should erase anything that is there and then check record and start recording the steps while you design. You can overwrite any step by Alt clicking on the red square next to the step. You can also move the steps around by click and dragging them in the list. And you can skip steps by checking the mute checkbox.
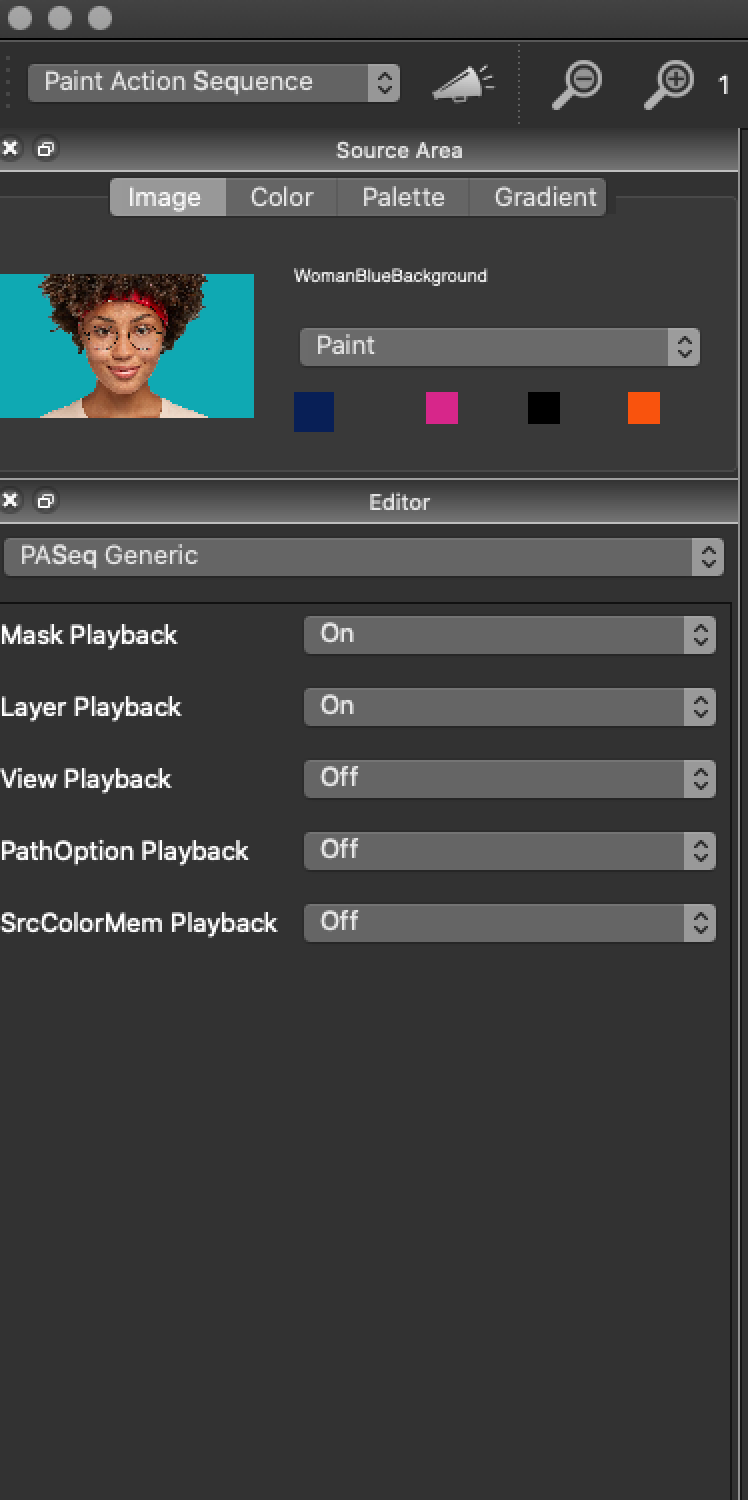
Layers:
If you are using layers or masking you need to turn those on in the PASeq editor. see attached. Make sure you are in Paint Action Sequence Mode and toggle to the editor.
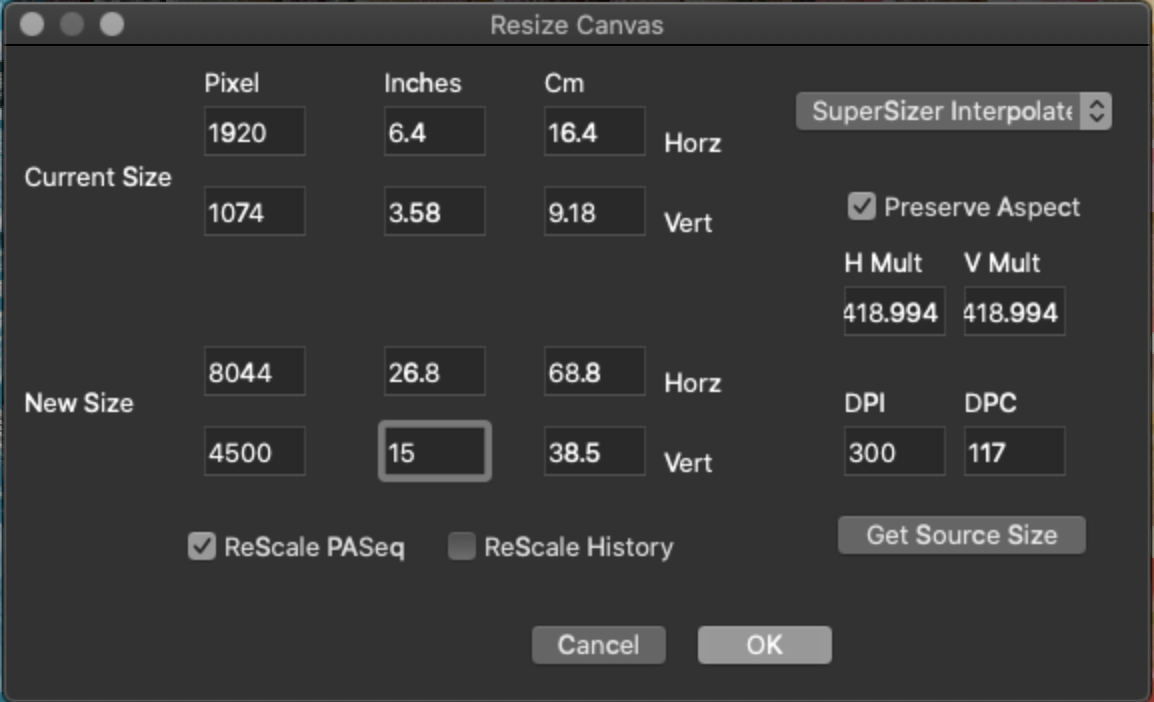
Printing or Outputting High Resolution:
When you are ready to print you would resize your canvas
Canvas > Resize Canvas
to the resolution you want and IMPORTANT: make sure you check Rescale PASEq (Paint Action Sequence) see below
Then you should play your rescaled paint action sequence into the larger canvas by clicking on play in the Paint Action Sequence window. It will render into the canvas and then you can save as .png or .tiff. You can then bring it into PS if you want for any color correction if that's important for you or you can print directly from SA.
DPI
So here's the thing about dpi. It only refers to printing. Pixels are what is important. So if you want a 10 x 10 print you need to have 3000 x 3000 pixels for it to print at 300 dots per inch and have your image 10 x 10 inches. If you wanted to have a 10 x 10 inch in image at 72 dpi it would be 720 x 720 pixels.
Here is a pixel calculator (there's a lot of them online) So you can calculate how many pixels you need.
https://toolstud.io/photo/dpi.php
All that being said when you resize the canvas to run your PASeq, you can just change the dpi to 300 and change the new inch size that you want and the canvas and pixels will resize accordingly. See attached.
One thing to be aware of is that SA will start to balk around 15k. A 30 x 30 inch print at 300dpi is 9k just to give you an idea. If you need to go larger than 15k you could cut the dpi down to 200 or 150.
I hope that helps reach back if you have any questions or if any of that wasn't clear.
0 Comments